Putting Kooday on your website
How to add the chat bubble and the "Talk to us" voice button to your own site — the snippet, the sites allowed to use it, the look, and what happens to a website conversation afterwards.
Your assistant already answers the phone and replies on WhatsApp. The same assistant can sit on your own website, in two forms:
- a chat bubble in the corner — a visitor types, and the reply streams back a few words at a time, live;
- a “Talk to us” button — a visitor clicks, grants microphone permission, and has a spoken conversation in the browser, running the identical pipeline a phone call runs.
Both are one <script> tag. There is nothing to install, no plugin, and no
change to how your site is built — the tag works on WordPress, Shopify, Wix, a
hand-written HTML page or a React app equally, because all it does is load a
script and draw its own bubble in a shielded corner of the page (your CSS cannot
leak into it, and it cannot leak into yours).
Each widget is one key locked to one bot and to a list of your own web addresses. Someone who copies the snippet off your page and pastes it on their site gets nothing: the key is refused from an address you have not listed.
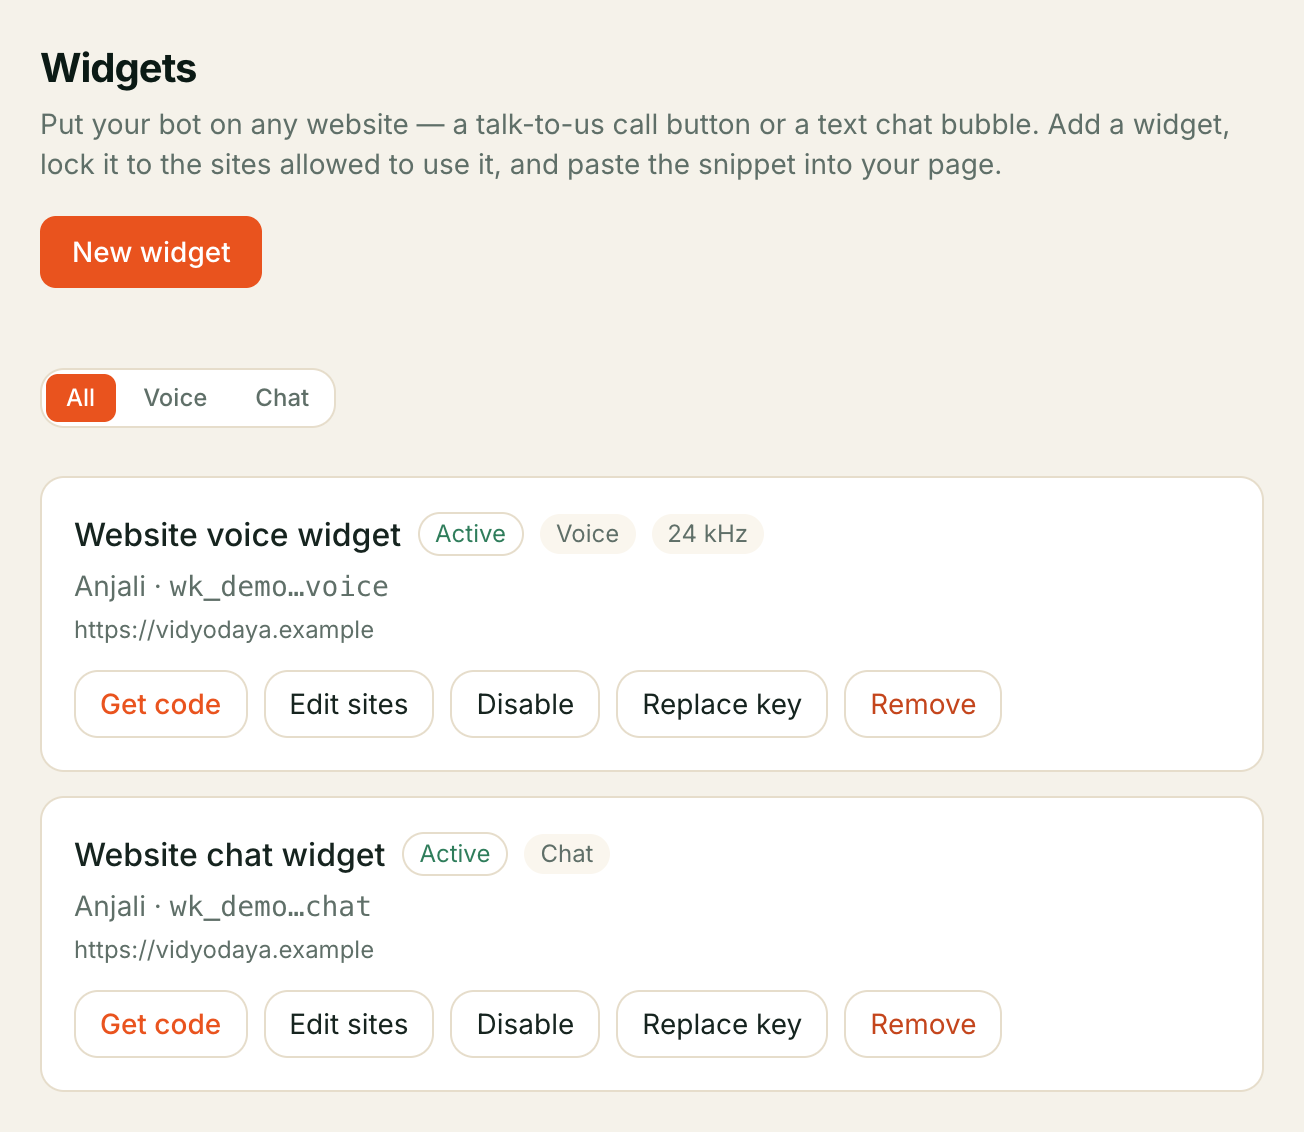
Where to find it: open Widgets in your dashboard. Only team members with admin access can open it.
For WhatsApp, Instagram, Messenger and phone numbers, see connecting a channel. This page is the website widget only.
The five-minute setup
- Widgets → New widget.
- Give it a Name (this is for you — Marketing site is a fine one), pick the Bot, and choose the Type: Chat or Voice.
- Under Allowed sites, type every web address the widget will run on — one
per line, including the
www.version if you use it. - Create widget. The next screen shows your key once. Copy the whole snippet.
- Paste it into your site immediately before the closing
</body>tag and publish.
Refresh your page and the bubble is there. That is the whole thing. Everything below is optional.
Step 1 — Adding a widget
The create form has four fields, and one of them only appears for voice.
| Field | What it does |
|---|---|
| Name | A label for your own list. It is never shown to a visitor. |
| Bot | Which assistant answers. The widget is locked to it permanently. |
| Type | Voice — “A call button — visitors talk to your bot.” · Chat — “A chat bubble — visitors type, replies stream in.” |
| Allowed sites | The web addresses allowed to load it. See step 3. |
| Audio quality | Voice only. Best (24 kHz), High (16 kHz), or Standard (8 kHz) — matches phone calls. Leave it on Best. |
Type is fixed once created. A chat widget cannot be turned into a voice widget later — make a second widget instead. Most sites end up with both, and that is the intended shape: one key each, both on the same page.
You can only pick a type your chosen assistant actually serves. If Chat is greyed out with “Web chat is switched off for …”, turn that channel on under Bots → Channels first. If instead it says the channel “isn’t available”, it is not on your plan — Contact your administrator to enable this channel. (This widget page only ever gates on Voice or Web chat, neither of which has a self-serve unlock — unlike WhatsApp/Instagram/Messenger, which you can connect yourself through Meta sign-in; see Creating your assistant.)
Step 2 — The key is shown once
On create you land on Your widget is ready — copy the snippet now.
The key inside that snippet is the only copy that exists. Kooday stores a
one-way fingerprint of it and nothing else, so nobody — including us — can show
it to you again. Afterwards the list shows only a hint of it, like
wk_live_7f3a…9c0, enough to tell two keys apart.
Copy the snippet before you close that screen. If you lose the key you are not locked out — press Replace key on the row and you get a fresh one — but the old key stops working immediately, so every page still carrying it goes dead until you paste the new snippet.
Reopening Get code on a row later shows the same snippet with
YOUR_EMBED_KEY where the key goes, so you can always recover the shape of
the snippet, but not the key itself.
Step 3 — Allowed sites
This is the setting that matters most, and the one people leave empty.
The key ships inside your public HTML — anyone viewing source can read it, and that is by design, the same way a payment provider’s publishable key or a chat vendor’s app id is public. What makes it safe is that a key only mints a session from an address on this list. Every other address gets the same flat refusal:
403— not authorized for this origin
The same refusal comes back for an unknown key, a disabled widget and a disallowed address, deliberately — someone probing your key learns nothing from the difference.
Write each address as scheme plus domain, nothing else: https://acme.com,
one per line. No path, no trailing slash, no wildcards.
| You type | Result |
|---|---|
https://acme.com | Works on acme.com only |
https://acme.com and https://www.acme.com | Works on both — list both if both resolve |
https://acme.com/contact | Rejected — drop the path |
http://localhost:3000 | Works, and is how you test before going live |
| (empty) | The widget loads nowhere |
The list shows you when it is empty, in the row itself: “No sites allowed yet — the widget won’t load anywhere until you add one.”
⚠️
www.and the bare domain are different addresses. A site that serves both and lists only one has a widget that works for half its visitors and is invisible to the other half — with no error anywhere you would see it.
Edit the list any time with Edit sites → Save sites. It takes effect on the next visitor.
What the list does and does not protect
It stops the ordinary problem completely: your key copied onto somebody else’s website, quietly spending your minutes. That page cannot mint a session.
It is not a firewall. A determined attacker not using a browser can claim any address they like when calling us. So the list is the first gate, not the last one — behind it sit your own limits, and those are the real ceiling on what a leaked key can ever cost you:
- a cap on messages per visitor, per business and per internet connection — around 30 messages an hour from one visitor and 120 an hour across your whole site — after which the visitor sees “Too many messages — please try again in a little while.”
- a ceiling on simultaneous conversations — “We’re handling a lot of chats right now — please try again in a moment.”
- a 4,000-character limit on a single message.
- for voice, your ordinary minute allowance and concurrent-call limit, exactly as a phone call consumes them. A widget call also ends at your assistant’s own maximum call length, five minutes unless you have changed it.
If you suspect a key has escaped, Replace key is instant and Disable takes it off every site at once.
Step 4 — The snippet
Press Get code on any row. The chat snippet is:
<!-- kooday chat widget -->
<script src="https://app.kooday.tech/widgets/chat/v1.js"
  data-tenant="acme"
  data-bot="support"
  data-key="YOUR_EMBED_KEY"
  data-api-base="https://chat.kooday.tech"
  data-position="bottom-right"
  async></script>
and the voice snippet is the same shape:
<!-- kooday voice widget -->
<script src="https://app.kooday.tech/widgets/voice/v1.js"
  data-tenant="acme"
  data-bot="support"
  data-key="YOUR_EMBED_KEY"
  data-position="bottom-right"
  async></script>
Copy it from your own dashboard rather than from this page — yours arrives with your business name, your assistant and your key already filled in.
Paste it before the closing </body> tag. If you run both, paste both tags;
they are independent and coexist happily. async means the tag never delays
your page loading.
Keep
data-api-baseon the chat tag. It names the Kooday service the chat bubble talks to, and the bubble cannot find it on its own — drop the line and the bubble loads but every message fails. It is the one attribute on the chat snippet that is neither yours nor optional, so copy the snippet whole rather than retyping the parts you recognise. The voice tag does not need it and does not have it.
Everything after data-api-base is optional.
Step 5 — Making it look like your site
Add any of these attributes to the same <script> tag. Colours take any CSS
colour — #c8102e, rgb(200,16,46), crimson.
The chat bubble
| Attribute | Default | Effect |
|---|---|---|
data-button-color | a blue bubble | The bubble’s colour |
data-text-color | white | Text and icon on the bubble |
data-title | Chat with us | The heading across the top of the chat panel |
data-greeting | (none) | An opening line shown when the panel opens |
data-launch-label | Open chat | The bubble’s accessible label, read by screen readers |
data-avatar-url | (none) | Your bot’s picture, shown as the launcher and in the header. Absolute https://, or a path on your own site like /assets/avatar.webp |
data-resumed-label | Continuing your earlier chat | The line shown to a visitor who has chatted before |
data-truncated-label | Earlier messages aren't shown | Shown above a restored conversation that was too long to show whole |
data-position | bottom-right | bottom-right or bottom-left |
data-status-label | Online | The line under the title, in the header |
data-color-scheme | light | light, dark, or auto to follow the visitor’s own device setting |
data-teaser | (none) | A proactive bubble shown before the panel opens. Off unless you set text |
data-teaser-color | matches the panel | The teaser bubble’s background |
data-teaser-text-color | matches the panel | The teaser bubble’s text |
data-teaser-delay | 3 | Seconds before the teaser appears, 0–60 |
The dashboard shows this exact example, which you can copy whole:
<script src="…/widgets/chat/v1.js"
  data-tenant="…" data-bot="…" data-key="…" data-api-base="…"
  data-button-color="#2563eb"
  data-text-color="#ffffff"
  data-title="Chat with Acme"
  data-greeting="Hi! How can we help?"
  data-launch-label="Open chat"
  data-position="bottom-right"
  data-teaser="Need help choosing a plan?"
  data-color-scheme="light"
  async></script>
The … in that block are placeholders — take the src, data-tenant,
data-bot, data-key and data-api-base from your own Get code snippet
and add the appearance lines to it.
There is no greeting unless you set one. Leave data-greeting out and the
panel opens empty and waits for the visitor to type. Setting it is the single
highest-value customisation here: an opening line that names what you actually
do (“Hi! Ask us about admissions, fees or timings.”) gets far more people to
type than a blank box does.
Two things about it are worth knowing. It is a fixed line of text, written by you and identical for everyone — your assistant does not compose it and has no idea it was said. And because it is drawn in the visitor’s browser rather than sent as a message, it does not appear in the Inbox transcript. A thread that reads as though the customer opened the conversation is normal.
The voice button
| Attribute | Default | Effect |
|---|---|---|
data-button-color | Kooday teal | The pill’s colour |
data-text-color | white | The label colour |
data-border-radius | a full pill | Any CSS length — 8px for squarer corners |
data-idle-label | Talk to us | What the button says before a call |
data-position | bottom-right | bottom-right or bottom-left |
data-mount | (floats in the corner) | A CSS selector — renders the button inside your own element instead |
data-mount="#call-us" is how you put the button in your header or beside a
pricing table rather than floating over the page.
Only the resting label is yours: while a call is connecting and running, the button narrates its own state so a visitor is never left wondering whether the microphone is live.
Driving your own interface
If you have designed your own chat window, set data-no-ui and Kooday draws
nothing — you get window.KoodayChat.createSession() with onDelta, onDone
and onError callbacks and render the conversation yourself. The dashboard
carries a worked example under Advanced — drive it from your own UI
(headless). The voice widget has the same escape hatch; kooday.tech’s own demo
phone is built on it.
Step 6 — Who your visitor is
Nobody has to log in or give a name. A first-time visitor is anonymous, and your assistant answers anyway.
What happens underneath: the widget keeps a private session id in the browser, so a visitor who wanders off and comes back next week is treated as a returning visitor and picks up where they left off — no repeated introductions. That is the whole identity story for most sites, and it needs no configuration.
Three consequences worth knowing:
- The session lives in one browser. Someone on their phone and on their laptop is two visitors, and always will be.
- Private or incognito browsing starts fresh every time, because there is nowhere to keep the session id.
- A web chat visitor is a separate record from their WhatsApp and phone history. Joining them is not automatic. When a visitor gives their number in the conversation, your assistant saves it as a contact your team can use to follow up. If it is a number you already hold for someone, it is kept as an unverified callback contact on the visitor’s own record, and your team sees it flagged. A number typed on web chat never connects the visitor to that person. A later WhatsApp message or call from the number is recorded under the sender’s own customer record, not under the website visitor.
If you drive the widget yourself (headless), a phone you pass alongside the message is handled the same way: it is a contact your team can use, not a merge.
| Route | What it gives you |
|---|---|
| Headless chat — drive the widget yourself and pass the visitor’s phone alongside their message | The number reaches your team as a contact to follow up on (an unverified callback if you already hold it for someone else) |
Treat it as a courtesy, never as a login: it personalises the conversation and controls access to nothing.
A phone number your page passes to the voice widget is not looked up. The
voice widget’s identity block (labelled below) can carry identity.from, but anyone can put
any number there, so your assistant does not treat it as the caller’s number:
it does not look the number up in your contacts, greet by the name on that
contact, or give your assistant’s tools that contact’s details. A web call is an
anonymous visitor unless they tell your assistant who they are in the
conversation. A real phone call or WhatsApp call is different: there the number
comes from the phone network, and your assistant recognises known contacts as
before.
Optional — pass visitor identity & page context
For what “the same customer record” buys you, see how your assistant remembers.
Step 7 — What happens after the conversation
This is the part that surprises people, so it is worth being exact.
A website chat has no ending. Nobody hangs up, nobody says goodbye — the visitor closes the tab. So Kooday waits: a thread that has been quiet for about 30 minutes is treated as finished, read once, and summarised. Only then can it become a deal on your pipeline.
⚠️ Website chat does not reach your board in real time. A visitor who asks about pricing at 10:00 shows up as a deal around 10:35, not at 10:00 — the wait is 30 minutes of quiet, plus up to five more before the next check. Watching the board during a live chat and seeing nothing is Kooday working, not a fault.
None of it happens at all until your pipeline is switched on. With the pipeline off, threads are still readable in your Inbox but nothing is ever summarised or created from them.
Three things follow from that:
- The whole exchange is read, not the first message. Someone who says “how much is it?” and then “actually never mind” is judged on the ending. Waiting is what buys that.
- A late reply produces a second reading, not a correction. Someone who returns two hours later starts a fresh assessment; it does not rewrite the first.
- Web chat feeds the board on a best-effort basis. Phone calls end with your assistant recording an outcome in your own vocabulary; a chat thread has no such moment, so its outcome is a short phrase written freely and may not match an intake rule you wrote for a call outcome. Treat calls as your dependable intake source. Setting up your sales pipeline explains intake rules.
Voice widget conversations are different: a call ends when the visitor hangs up, and from there it behaves exactly like a phone call — the same transcript, the same outcome in your own vocabulary, and the same dependable intake onto your board.
The conversation is readable, and nothing chases it
Every web chat thread appears in your Inbox under the Web chat tab, and you can read all of it.
Nothing follows up on it, ever, and that is permanent rather than pending: there is no way to reach a browser tab that has been closed. If a web chat lead needs chasing, chase it on a channel that can be reached — see when does your assistant follow up?
What web chat cannot do
Read this before you put the bubble on a page where a customer might need a person.
| Web chat | |
|---|---|
| A person replying to the visitor | No. The thread is read-only in your Inbox |
| Customer sending a photo or file | No. There is no attach button |
| You sending a document or PDF | No — a link to a file is fine, an attachment is not |
| Product cards with a photo and price | Yes |
| Automatic follow-up afterwards | No, and never — the tab is closed |
| Reaching your pipeline | Yes, once quiet ~30 minutes |
⚠️ Nobody at your business can answer a web chat visitor. Open a web chat thread in the Inbox and where the reply box would be you get: “Read-only — the assistant handles Web chat conversations. Human replies aren’t available on this channel yet.” Take over is a WhatsApp, Instagram and Messenger capability; on web chat there is nothing to take over to.
Your assistant can still decide a web chat needs a person, and the thread will say so — but there is nowhere for that person to reply. A flag on a web chat thread is a prompt to phone or message the customer on another channel, not something you can pick up in the Inbox.
The practical consequence: if your assistant cannot help a website visitor, the visitor is stuck unless you have given it somewhere to send them. Make sure your assistant knows to ask for a phone number or WhatsApp when a conversation is going past what it can answer — that turns a dead end into a channel a person can actually work. A number typed on web chat is kept as a contact for your team and never links the visitor to anyone.
Turning one off
Three levels, in increasing severity:
| Action | Effect |
|---|---|
| Disable | The widget stops loading everywhere. The snippet can stay on your page. Re-enable any time. |
| Replace key | A new key is minted and the old one dies immediately. Every page carrying the old snippet is dead until you repaste. |
| Remove | Permanent. The dashboard asks: “Remove ”…”? The embed will stop working on every site using it.” |
Switching the channel off under Bots → Channels also stops the widget, and the row will say so — its status chip reads Web chat off instead of Active, and Get code replaces the snippet with an explanation rather than handing you code that cannot work.
Troubleshooting
The bubble doesn’t appear at all
In order:
- Is the tag actually on the published page? View source and search for
widgets/chat/v1.js. - Is the address you are looking at in Allowed sites, exactly — scheme,
domain, and
www.if that is what the browser shows? - Does the row say Active? If it says Web chat off, turn the channel on in Bots → Channels.
- Are
data-tenant,data-botanddata-keyall still filled in? A snippet pasted from Get code still contains the literalYOUR_EMBED_KEY— replace it with your real key. - Open the browser console. The widget explains itself there rather than on the page.
The bubble was there and now the corner is empty
A refused key does not draw an error — the bubble removes itself, so a widget
that is refused looks exactly like a widget that was never installed. Nine times
in ten the address is not on Allowed sites: something changed the address
your visitors arrive on (a new domain, a move from www. to the bare domain, a
staging URL). Compare what your browser’s address bar shows against the list,
character for character.
Visitors see “Sorry — the chat is unavailable right now.”
The widget loaded but could not reach Kooday. Two causes, in order:
- The address is not on Allowed sites. The common one — check it exactly,
scheme and
www.included. data-api-baseis missing from the tag. View source on your published page and check the chat<script>still has it. A snippet that was hand-typed, trimmed, or pasted from a page older than August 2026 can be missing that line, and without it the bubble draws normally and every message fails. Press Get code in Widgets, copy the snippet whole, and replace what is on your page.
Note that this affects the chat bubble only — the voice button does not use that attribute.
It works on the staging site but not the live one
Different address, so it needs its own line in Allowed sites. Add the live one; there is no need to remove staging.
It worked yesterday and stopped today
Someone pressed Replace key. The old key died the moment they did. Paste the new snippet, or press Replace key again and paste that one everywhere.
Visitors get “Too many messages — please try again in a little while.”
The per-visitor and per-business message caps. On a normal site nobody reaches them, so seeing this at any volume usually means your key is in use somewhere you did not put it. Check Allowed sites, then Replace key.
The voice button appears but never connects
The visitor has to grant microphone permission, and browsers only offer that on
https:// (or localhost). A site still served over plain http:// gets a
button that can never start a call.
The chat panel opens with nothing in it
That is the default. Add data-greeting="…" to the tag for an opening line.
A returning visitor sees their earlier conversation
Someone who has chatted with you from the same browser before gets that conversation back when they reopen the panel, with the line “Continuing your earlier chat” between what came before and this visit. Both are drawn by the widget, not said by your assistant.
Some details worth knowing:
- The last 50 messages, newest end first. A longer thread shows “Earlier messages aren’t shown” above the oldest one on display.
- Same browser only. The panel identifies the visitor by something stored in their own browser, so a different device, a different browser, or cleared site data is a fresh start — for the transcript and for the conversation so far.
- Web chat only. If the visitor has also messaged you on WhatsApp or Instagram, none of it appears here. The panel shows this conversation.
- Messages you have deleted stay deleted. If your retention window has passed, the content is gone from our side, and the visitor sees the line without the messages.
- Your
data-greetingis skipped on a visit like this. Replaying a scripted hello above a conversation the visitor can see would read as a restart that did not happen.
Set data-resumed-label="…" and data-truncated-label="…" to word both lines
yourself — worth doing if your site is not in English, since the conversation
under them is in whatever language your customer used.
A customer says they sent a photo and got no reply
They cannot — web chat has no attachment support, so the photo never arrived. Ask them for it on WhatsApp.
A sensible first configuration
Two widgets, both on every page:
Widget 1
  Name           Website chat
  Bot            Reception
  Type           Chat
  Allowed sites  https://acme.com
                 https://www.acme.com

Widget 2
  Name           Website call button
  Bot            Reception
  Type           Voice
  Allowed sites  https://acme.com
                 https://www.acme.com
  Audio quality  Best (24 kHz)
and on the page, before </body>:
<!-- kooday chat widget -->
<script src="https://app.kooday.tech/widgets/chat/v1.js"
  data-tenant="acme" data-bot="reception" data-key="YOUR_CHAT_KEY"
  data-api-base="https://chat.kooday.tech"
  data-button-color="#c8102e"
  data-title="Chat with Acme"
  data-greeting="Hi! Ask us about pricing, timings or bookings."
  data-position="bottom-right"
  async></script>

<!-- kooday voice widget -->
<script src="https://app.kooday.tech/widgets/voice/v1.js"
  data-tenant="acme" data-bot="reception" data-key="YOUR_VOICE_KEY"
  data-button-color="#c8102e"
  data-idle-label="Call Acme"
  data-position="bottom-left"
  async></script>
Two keys, both domains listed, one bubble on each side so they do not overlap,
and a greeting that tells a visitor what to ask. Add data-mount later if you
would rather the call button lived in your header than floated over the page.
Still stuck? We answer support mail the same working day.
Email support